Thursday, 17 December 2015
Create Your Own Blog in 5 Steps
Hello mate,
In this Post, I am going to post about Create your Blog in 5 steps.
A Blog is a website that is updated with the latest news, trending technologies, cooking recipes, Health tips, Science & Arts, and also people share their own experience and they also write about their interested topics.
A Blog is a free platform provided Google that offers a website for a single user who is having a Google Account or Gmail Account.
Learn How to Create a Gmail Account Here
Create your Own Blog here in 5 steps
You have to follow only five steps to create your Blog
I have included my first infographics here:
Step 1:www.gmail.com
If You don't have your own Gmail account create Gmail Account here.
Step 2: www.Blogger.com
To create your own blog, the next step is to go to WWW.BLOGGER.COM and sign in with your Gmail account.
After Sign-in
Step 3: New Blog
Then the blogger dashboard will be opened in that click New Blog.
Step 4: Blog Title & Blog Address
Then a window will be opened in that it asks for the Blog title and Blog address.
Blog title will be displayed on the top of your Blog.
In this post, I am creating a blog called million informations
Blog address is that it is your unique address of your blog that can be used search in the Web Browser like Google Chrome, Mozilla FireFox.
In the above example, I have typed the address as millioninformations but it indicates that this blog address is not available that means the address is already chosen by someone else, so better try the related address such as millioninformationsdemo and if the address is available then click Create Blog! or else try another address until it is available and then click Create Blog!
Step 5: Create Blog
Then click create blog
Then your Blog will be created
To view your blog, there are two ways
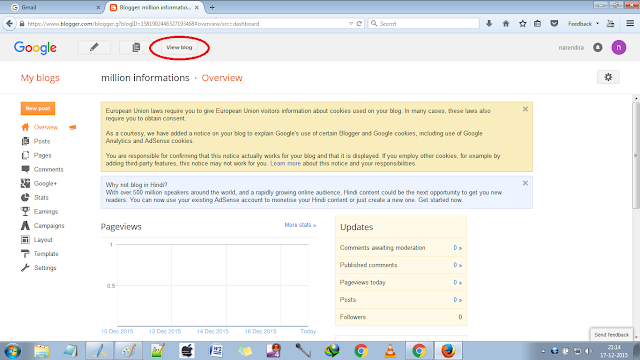
1. Click View Blog on the top of your Blogger Dashboard
2.Type the address of your Blog in the address bar of your Web browser,
For example: www.millioninformationsdemo.blogspot.in
This is your Blog!!!
Congratulations !!! You have Successfully created your own blog !!!
How was the post Create your own blog in 5 steps was?
You can also create many blogs in a single Gmail account.
In the next post, I will tell you how to post a content !!!
Read here:
How to Write Posts in Blog
If you create your blog by reading this article kindly mention your blog address below in comment section.
Share this article to your friends...
Sunday, 25 October 2015
How to Upload Videos in youtube

Hai guys in this post i am going to tell you how to upload videos in youtube in 4 simple steps.
The Youtube is the most visited video site. It is the repository of videos. You can get any type of videos here, Youtube also provides the facility of uploading your own videos also, it is the main success of the youtube.
Now i will tell you the easy way of uploading your own videos in youtube.
step 1: Sign into your Gmail Account

Sign in into your Google account that is your Gmail account. If you don’t have your Gmail account create your Gmail account here .
If you do no to create a Google account you can read my post how to create a Gmail account also you can watch my video of how to create a Google Account.
step 2: Go to www.Youtube.com
Once you sign into your Google Account then open the youtube , type the url www.youtube.com in your web browser.

Then Click the upload button in the top right corner as shown in the image

Then the upload video page will be opened

Step 3: Select the video to be uploaded
Now click the up directed arrow to select the video to be uploaded


select the video and click open

Then your video will be uploaded according to your video size if it is too large it will take more time to be uploaded.
You can see that the video is uploading

Once your video is uploaded it will start processing the video

Then the processing will be done

Then you can give the title for your video, can add a description to your video that what is your video about , you can also add message to your video, select related tags.

You can choose a thumbnail to be displayed on the youtube

Step 4: Click the Publish Button
Once your video is uploaded, processed and the details are filled then your video is ready for publishing. Click the Publish button on the top right side.

Once you click the publish button your video will be live in the youtube. You can find your video URL at the left side as shown in the image.

After your video is uploaded you get the screen like this

You can share your video on Facebook, twitter,Google+,Blogger,etc..
You can see your videos URL here also you can also get the Embed code here.
To watch your video on youtube copy the link and paste it on the search bar and click enter

Hurray !!!
Your video is successfully uploaded in youtube

Thus in a simple 4 steps you have successfully uploaded your video in youtube.
see the video that will explain in detail about uploading the video in youtube
I hope the post was useful share the post if you like it.
Realated video:
How to download youtube videos
Friday, 23 October 2015
Create your own GOOGLE Account
Hai guys i have already posted how to create a gmail account you can read it in text format. In this post i am going to show you how to create the gmail account practically . I have uploaded a video in youtube and inserting the video here.
Sunday, 27 September 2015
Project Loon- Internet for everyone
You may heard about this new technology Project Loon. Let we see about it.
Now a days internet has became very important in a man’s life as important as food,cloths and shelter. In upcoming era the basic necessities of an average man will be Food, shelter, Cloths and INTERNET. Weird but true. The usage of internet has increased tremendously.
The impact of Smart phones is the main reason for the increase in usage of internet.
Now a days almost every one have the facility to access to the internet, also with the high speed internet like 3G, 4G.
But in some rural areas they have the difficulties getting of good internet access, they can only get the internet speed of 2G speed, in some places they don’t even get the internet connection.
In such places there may be only certain number peoples have the knowledge about using internet and they only need the internet connection. But it is difficult and it is not profitable to the telephone network who providing the internet service for providing special internet connection to the remote areas for a very small about of subscribers. Many telephone networks tried to solve this very basic problem but they could not succeed in it.
So the god of internet and the king of internet The GOOGLE tried to solve this global issue and successfully found a solution to solve this issue.
Google is a place of birth of creativity. So it founded a great solution to solve this issue of providing internet to the remote areas also.
This project is named as PROJECT LOON- Internet for every one.
This project uses the BALLOONS to provide the internet, this is the secret of this project.
There are two main radio transceivers on each balloon: a broad-coverage LTE base station and a high-speed directional link used to connect back to the Internet. There is also a third backup radio that can be used to communicate with the balloons from the ground if the others fail or go out of range.
These balloons is floated in the Stratosphere at the height of 18-27 km or 60000 feet to 90000 feet almost above the height of aeroplanes fly. So there is no chance for accidents in the sky.
These balloons will provide internet around 40 km surroundings to receive the internet provided by the Loon the user must have a special receiver in their homes.
To provide the internet all over the world nearly 2000 such balloons are required with a certain interval between the balloons.
Each balloon will fly around 100 days to 130 days, the fuel for it is through the solar light and also charged battery.Once the fuel become finished or it reaches the day of 100 or above the maintenance team will monitor the path of balloons travel and it also monitor the usage of fuel , service provided details and so on… Once the fuel is finished the monitoring team will make the balloon to fell down in a specified space and the fuel is filled and the balloon is made to fly again.
The Google can make 20 balloons to fly in a single day. This can help the peoples in the mountains, islands villages and the ships going in the sea can all access the internet facility.
These balloons can provide internet upto 4G speed .
Since the data coverage area is 40 km nearly 100 and above users can access a single balloon to access internet access.
The balloons are controlled by positioning of the Loon fleet is adjusted and controlled from Loon Mission Control, using a combination of automatic planning and human oversight. In addition, the individual balloon vehicles perform some automatic flight control functions, such as venting gas to prevent a burst or parachute deployment in case the balloon descends too quickly
Here is a video of Project Loon from youtube
Tuesday, 28 July 2015
HOW TO CHANGE THE GMAIL PASSWORD
PASSWORD IS LIKE A BRUSH
YOU SHOULD NOT SHARE IT WITH ANYONE
YOU SHOULD CHANGE IT 6 MONTHS ONCE.
A good password must be the combination of letters, symbols and numbers with 8 digits minimum.
Now a days Gmail has become the most used mail service by the students and professions.
So here is a tip to change the password in Gmail
Log in to your Gmail account click MyAccount as shown in the figure
Then My Account page will be displayed. Click Sign-in & Security
Scroll down you can see The passwords
click password then it will asks you to log in to your Gmail again. Login…
Then it asks for the new password type the new password remember that your password must be the combination of letters symbols numbers with minimum 8digits.
give the password then click change password
That’s it you have changed the Gmail password successfully
Hope the tip was useful…
Saturday, 18 July 2015
What is a blog?
So What is a blog?
A Blog is nothing but it is a day to day update of your interested subjects or writing about anything that you love mostly. For example, you may write about cooking, sports, computer,film,celebrities, current events, about some technology,etc.…
The history of blog has two different popular stories which are broadly accepted.
In the 19th century a captain of a ship used to write the daily activities in a log so later it became BLOG.
The another story says that the log(information's or data that are often maintained in the web ) is called as WEB+LOG =WEBLOG later it is called as WE BLOG later it is just called as BLOG…
BLOGGING is an activity of writing and posting yours interested topic daily.
You know one interesting news you can earn money through blogging!!!! Amazing isn't you get money through writing your interesting topic.
here is a video from YOUTUBE about WHAT IS A BLOG?
Let us know in detail about blog.
A BLOG can be created using blog spot(provided by Google) or word press(a private community).
Now i am going to show a demo oh how to create your own blog.
1.Open your web browser

2.Type www.blogger.com in the address bar and click enter

Then it asks for your Gmail id. I have already posted an article on how to create a Gmail id if you have missed the article click the link to view(http://www.millioninformations.com/2015/07/gmail-account-creation.html). If you already have the Gmail then use it to create your own blog.

Enter the password

Then the blogger will be opened. Click continue to blogger

Then click new blog as shown in the image

Then you can create your own blog as shown in the image by filling up the details title and an address like your blogs name and choose a template, choosing the blog’s template here is just for a basic set up you can change it later and click create blog


Then your blog will be created

This is your blogs administrative page


The first option is posts.
By clicking it so, you can view what are all the posts you have posted so far and also you can create your new post here.

Click New Post to create your new post


After finishing typing your post you can click publish option to publish your content in your blog


Then click view blog option to view your blog.

How’s your blog cool isn’t.
The next option is pages. Pages is default content on your blog such as about us, contact us,home etc..


Then click publish

The next option is comments . Comments is a section where any readers of your blog posts their review or comments on their personal experience it may be good or bad, it’s for your future improvement.

The next option is Google+. This option is to mainly share your posts to your Google+ viewers.

Then our most important option is Stats, it allows you to view the viewers across the world and visiting your blog through which operating system and web browser, number viewers today,yesterday,last month etc.. will be present.
This option is quite useful for maintaining your Blog’s Traffic(traffic is nothing but the number viewers to your blog).

The next option is Earnings. It’s a basic settings for some earnings on blog.


The next option is campaign

The layout is setting up your blog’s view.

how to change a template in blog?
Setting up a new template is an easy process. Click Template option.

There will be some default templates already present on your blog if those templates are enough then you can choose it.

If you want a third party template you can download it from the net.
Open your web-browser and type top 50 blogger templates you will find many web sites choose the first link and click download option that you like most as shown in below images.


After downloading the template, extract it by right clicking on it using the RAR software which is a free software available on the net.

Then come back to your blogger dashboard and click templates and click Back up/restore option as shown in the image.

after clicking it select the extracted file


click view blog to see the changes

Wow your blog is looking quite super than before…
Congratulations… you have changed your template successfully.
The next option is settings it is just some basic as well as technical settings such as redirecting your blog to your custom domain,etc..


Viewers these are some of the things i would like to share all about Blog that all i know….
Thank you for reading this useful article.
I hope it will be useful for you.
Also Read:


