Thursday 22 June 2017
Expense Manager Android App - Free source code
Sticky Notes Android Application - Source code for free
Download Sticky Notes Android App Developed by Narendiranath blogger - Millioninformations.com
Download App
Download Source Code
How to Use: screen shots
Monday 19 June 2017
Working with CheckBox in Android
Read Working with Buttons in Android
Working With CheckBox is similar to that of Button.
Create a new Project and drag and drop a Checkbox
Then open MainActivity.java and register the checkbox
isChecked is a Boolean variable which gives two results on clicking the checkbox it gives true and when it is unchecked it gives false.
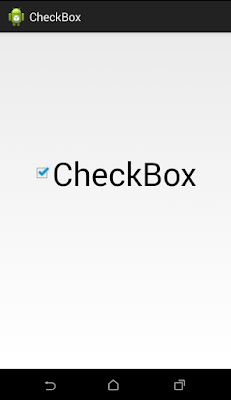
The Output will be
Read How to Develop a BMI calculator App.
Sunday 18 June 2017
How to Create BMI Calculator Android App
Download the Source Code for this BMI calculator
Downlod APK
I make this post simple as possible in the coding point of view.You can read what is BMI and what is the formula to calculate our Body Mass Index.
I am simply explaining how to develop a BMI Calculator Android App.
Just read my previous posts like How to work with Buttons, How to add two numbers in Android and a Simple Calculator app.
If you have practiced the above examples it will be easy for you to do this BMI calculator app.
Create a new Project, drag and drop 2 Edittext to enter the height and weight, a button to calculate and a TextView to display the result also use the Hint.
After register the button, Edittext and Textview in MainActivity.java
After that write the below code inside the onClick()
@Override
public void onClick(View arg0)
{
final DecimalFormat df2 = new DecimalFormat(".##");
Double weight,height,heightinmeter,bmi,finalht;
weight=Double.parseDouble(wt.getText().toString());
height=Double.parseDouble(ht.getText().toString());
heightinmeter=height*0.3048;
finalht=heightinmeter*heightinmeter;
bmi=weight/finalht;
bmival.setText(""+df2.format(bmi));
if(bmi<18.5)
{
res.setText("underweight");
}
else if(bmi>18.5&&bmi<24.9)
{
res.setText("normal weight");
}
else if(bmi>25&&bmi<29.9)
{
res.setText("overweight");
}
else if(bmi>30&&bmi<39.9)
{
res.setText("obesity");
}
else if(bmi>40)
{
res.setText("severe obesity");
}
}
final DecimalFormat df2 = new DecimalFormat(".##");
this line is used to print only two digits after the dot for ex: 21.23
heightinmeter=height*0.3048;
this line will convert your height in feet to height in meter
Formula for calculating:
heightinmeter=height*0.3048;// meter=feet*0.3048
finalht=heightinmeter*heightinmeter;// height=meter*meter
bmi=weight/finalht; // bmi=weight/height
This is the BMI standard
if(bmi<18.5)
{
res.setText("underweight");
}
else if(bmi>18.5&&bmi<24.9)
{
res.setText("normal weight");
}
else if(bmi>25&&bmi<29.9)
{
res.setText("overweight");
}
else if(bmi>30&&bmi<39.9)
{
res.setText("obesity");
}
else if(bmi>40)
{
res.setText("severe obesity");
}
{
res.setText("underweight");
}
else if(bmi>18.5&&bmi<24.9)
{
res.setText("normal weight");
}
else if(bmi>25&&bmi<29.9)
{
res.setText("overweight");
}
else if(bmi>30&&bmi<39.9)
{
res.setText("obesity");
}
else if(bmi>40)
{
res.setText("severe obesity");
}
The output will be
You can also add some colors to your app like this
I have used directly meter in this above example.
Saturday 17 June 2017
How to Change Button image when button is clicked
Download Source Code of this Example
Read
How to Use Image as a Button in Android
After practicing the above example you can do this example.
Changing Button image when the button is clicked is popular in may android applications.
For example : In Movie tickets booking application , if we select a seat it's image will be changed to different color or image.
We are going to do the same in our Example.
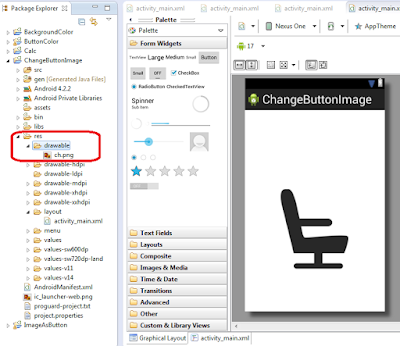
First create a new project drag and drop a button, copy a chair image from your computer and paste it in new drawable folder under res directory and do the xml coding part required to set the image to the button as you have practiced in the last example.
Till that you will get the result as:
Then also copy and paste another chair image which is in different color. i have choosen red color chair.
Then Open MainActivity.java and register the Button part and also include a boolean variable to check the button is clicked or not clicked.
Then use switch staement and type the code as in the image
public class MainActivity extends Activity implements OnClickListener {
Button chair;
Boolean b=false;
@Override
protected void onCreate(Bundle savedInstanceState) {
super.onCreate(savedInstanceState);
setContentView(R.layout.activity_main);
chair=(Button)findViewById(R.id.button1);
chair.setOnClickListener(this);
}
@Override
public void onClick(View v)
{
switch (v.getId()) {
case R.id.button1:
if(b)
{
chair.setBackgroundResource(R.drawable.ch);
b=false;
}
else
{
chair.setBackgroundResource(R.drawable.redchair);
b=true;
}
break;
default:
break;
}
}
}
In the above code i have used the if conditon to check whether the chair is clicked or not.
If the chair is not clicked the black chair will appear or if it is clicked red chair will appear, if the chair is clicked again the black chair will appear.
This condition will be useful in real time application because, the user may want to select a chair first but later he can choose a different chair, the application must be user friendly, thus we are using such a code.
the setBackgroundResource is similar to that setting background in xml file.
The output will be
When clicked again
You can try out with your own ideas also you can combine this with
Working with multiple buttons in Android
use switch statement with different button id's and with the help of if else conditon you can change multiple button's images.
Practice the previous examples well.
Subscribe to:
Posts
(
Atom
)


