Thursday 18 June 2015
WINDOWS 7 USB install guide for beginner
You may have heard some issues in installing windows OS such as windows 7 USB install not working and windows 7 USB install stuck at setup is starting but in my article i have given a clear cut steps to install windows 7 using a USB. Windows 7 installation is very easy by using following requirements.
The Requirements are:
1.Windows 7 OS (32 bit or 64 bit)
2.Power ISO5
3.Windows 8 all versions activator
4.8 GB or 16 GB pen drive
5.avast free antivirus
6.DriverPackSolutions
7.MS OFFICE
8.ADOBE READER
9.WINZIP
10.VLC media Player
Once you have collected all the requirements above your ready to change the OS and you can able to install all the necessary software's for the basic needs.
Now let we see how to change the OS .
1.The first step is to make the pen drive Bootable device.
It can be done using the POWER ISO5 software.
This is how the Power ISO5 looks like

Now first we have to convert the downloaded windows 7 file into a image file using power ISO5 tool.
To convert the file into image file follow the below instructions.
Open Power ISO tool. In the tool bar you can see that a ADD option click ADD FILES AND FOLDERS option.

you can select the downloaded windows file and click add then save the file as .iso file in your required destination folder.
That’s it now you have created the image file.
2. Now our next step is to make a bootable USB device
To make the bootable USB device follow the instructions
i. Plug the USB device into your system or laptop
ii. Then open Power ISO and click TOOLS option in the menu bar

iii. Then click Bootable USB drive option as shown on the above image.
iv.Then a following window will be opened as shown below

If you see the above image the destination USB drive will be automatically selected by the power ISO tool then you have to select the Source Image file(that we have already created )
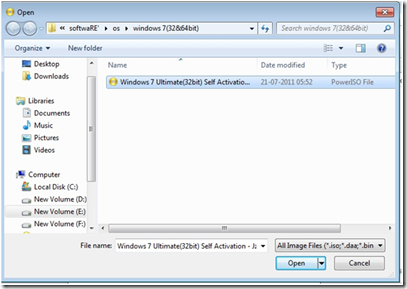
vi.The image file will look like in the above image select that file and click open. After clicking open it will look like

if you notice that the path of the image file will be displayed
vii.Then select the WRITE METHOD as USB-HDD and the final step is just to click start option

viii.Then a dialog box will be opened showing a warning message as
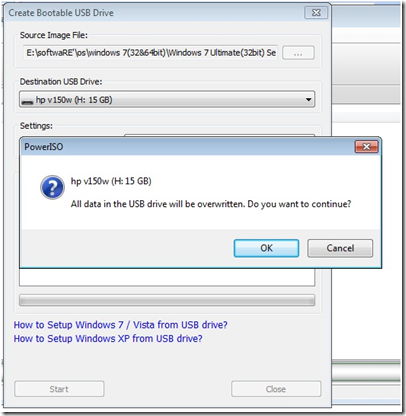
if you have any data on the pen drive take a backup and then continue the work. If you have no data on the pen drive just click OK.
ix.After clicking ok the process will be started

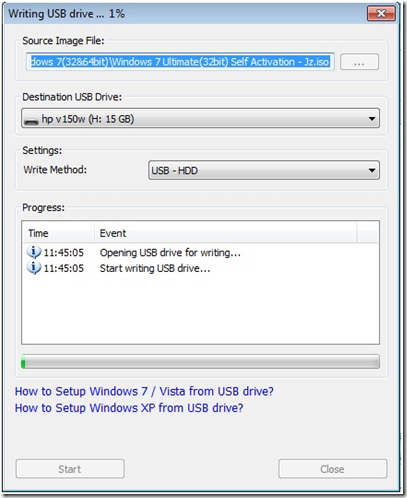
If you notice at the top of the image the percentage of completion
will be displayed and a progress indicator will be also displayed
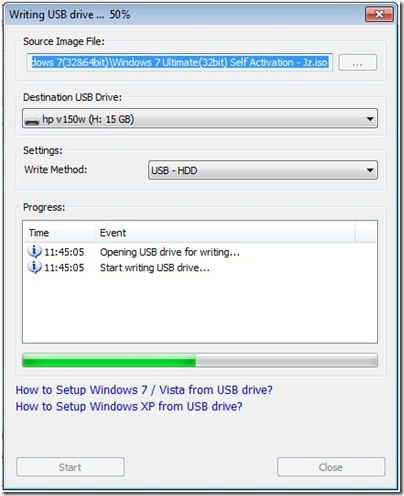
Wait until it completes 100% after completion it will look like

Then click OK.
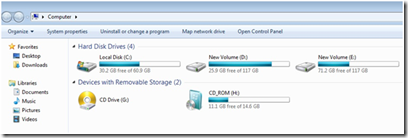
Now see your pen drive in MY COMPUTER it will look like
3. Our next step is to change the OS
Now restart the system with the pen drive plugged in and go to BOOT option and select the boot priority
Select the pen drive as the first boot priority option then click save and exit option.
Now the Windows files will be loaded wait for a minute.

Then the installation will start
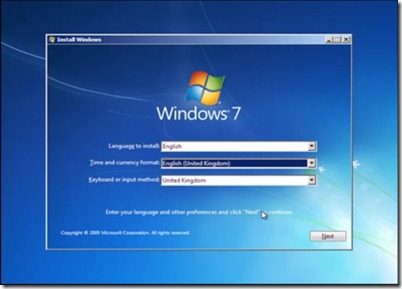
Now it will asks for the language select UK and language as ENGLISH(INDIA) then click next
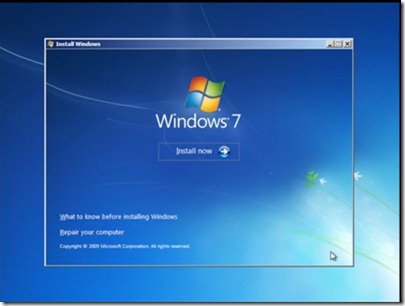
Then click Install now to start OS installation
Then the setup will start

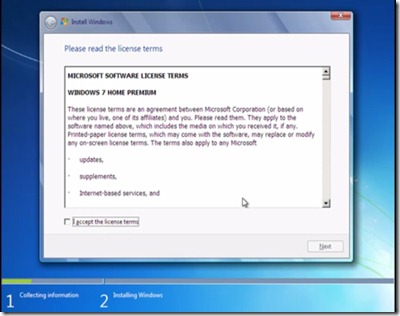
Then Microsoft’s terms and conditions will be displayed and click accept the terms and conditions and click next
Then it asks for type of installation so select custom installation

After clicking the custom installation the selection of storage disk is made on which the OS has been installed, so select the drive and if you want to format the disk you can do it in the driver options
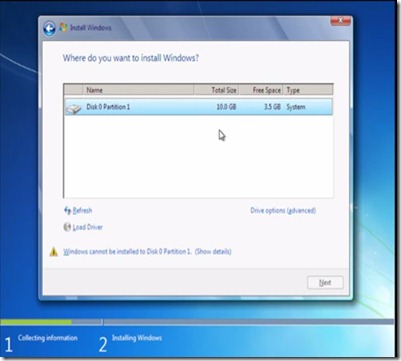

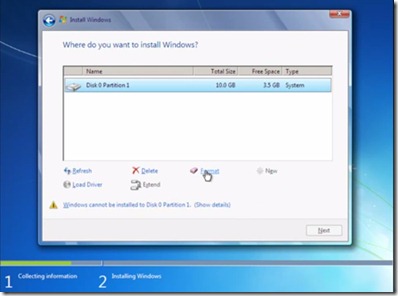
Then click next and a dialog box will be opened showing that all the contents will be overwritten on the disk and click ok

After clicking ok the actual OS installation will be started

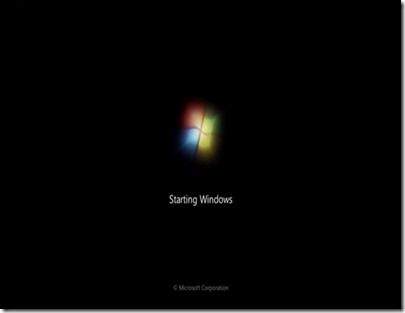
Then series of installation will be there NOTE THAT YOU MUST REMOVE THE PENDRIVE AFTER THE COMPLETION OF EXPANDING WINDOWS FILES or after installing features or before the computer restarts otherwise the windows files will be loaded from the first step.
Then
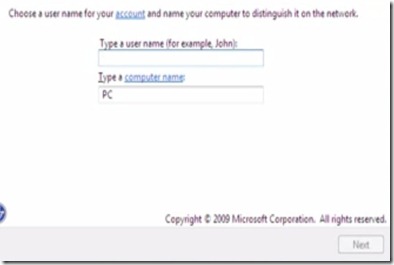
 Then the setup asks for username of the pc
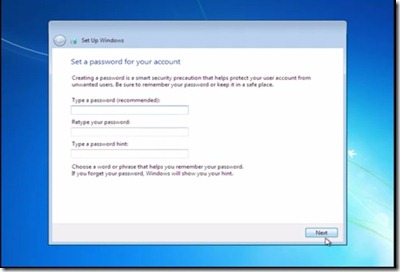
Then it asks for password enter a new password and click next.
Then in the next window click use recommended settings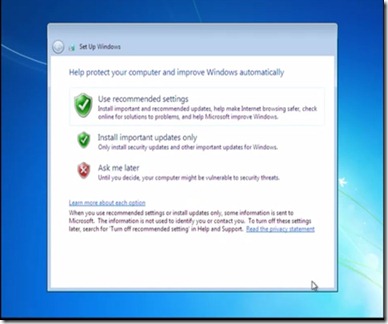
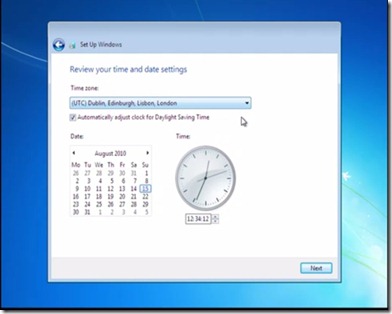
Then set the correct date and time and click next
Then select the type of network
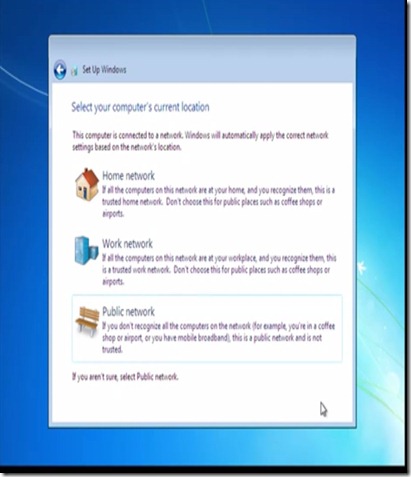
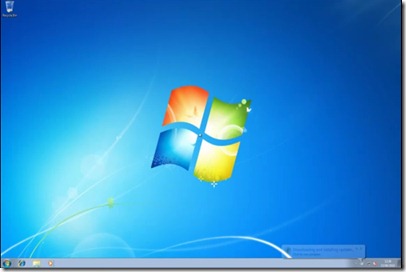
it is the last step is setup after clicking the appropriate network type the desktop will be prepared

At last we have successfully installed the OS….
4. our next step is make the new OS properly function for that it must be activated for this purpose only i have suggested the windows 8 all versions activator. Click it and follow the simple instructions and complete the task.
Then your system will be restarted, that’s it you have successfully changed the OS and activated it.
5.Then we have to install the drivers using DriverPackSolutions
6.Then install the necessary software’s like MS OFFICE, antivirus, media player etc... so that you can able to perform the basic tasks on your system without any problems.
That’s it guys we have changed the os successfully.
If any corrections in the above instructions then comment the post and i can be able to change it.
But i have tried this technique several times to change the OS and my system works quite properly.
Thank You for visiting the blog www.millioninformations.com
I will update further more information’s as soon as possible.
The Requirements are:
1.Windows 7 OS (32 bit or 64 bit)
2.Power ISO5
3.Windows 8 all versions activator
4.8 GB or 16 GB pen drive
5.avast free antivirus
6.DriverPackSolutions
7.MS OFFICE
8.ADOBE READER
9.WINZIP
10.VLC media Player
Once you have collected all the requirements above your ready to change the OS and you can able to install all the necessary software's for the basic needs.
Now let we see how to change the OS .
1.The first step is to make the pen drive Bootable device.
It can be done using the POWER ISO5 software.
This is how the Power ISO5 looks like

Now first we have to convert the downloaded windows 7 file into a image file using power ISO5 tool.
To convert the file into image file follow the below instructions.
Open Power ISO tool. In the tool bar you can see that a ADD option click ADD FILES AND FOLDERS option.

you can select the downloaded windows file and click add then save the file as .iso file in your required destination folder.
That’s it now you have created the image file.
2. Now our next step is to make a bootable USB device
To make the bootable USB device follow the instructions
i. Plug the USB device into your system or laptop
ii. Then open Power ISO and click TOOLS option in the menu bar

iii. Then click Bootable USB drive option as shown on the above image.
iv.Then a following window will be opened as shown below

If you see the above image the destination USB drive will be automatically selected by the power ISO tool then you have to select the Source Image file(that we have already created )

vi.The image file will look like in the above image select that file and click open. After clicking open it will look like

if you notice that the path of the image file will be displayed
vii.Then select the WRITE METHOD as USB-HDD and the final step is just to click start option

viii.Then a dialog box will be opened showing a warning message as

if you have any data on the pen drive take a backup and then continue the work. If you have no data on the pen drive just click OK.
ix.After clicking ok the process will be started


If you notice at the top of the image the percentage of completion
will be displayed and a progress indicator will be also displayed

Wait until it completes 100% after completion it will look like

Then click OK.
Now see your pen drive in MY COMPUTER it will look like

3. Our next step is to change the OS
Now restart the system with the pen drive plugged in and go to BOOT option and select the boot priority
Select the pen drive as the first boot priority option then click save and exit option.
Now the Windows files will be loaded wait for a minute.

Then the installation will start

Now it will asks for the language select UK and language as ENGLISH(INDIA) then click next

Then click Install now to start OS installation

Then the setup will start

Then Microsoft’s terms and conditions will be displayed and click accept the terms and conditions and click next

Then it asks for type of installation so select custom installation

After clicking the custom installation the selection of storage disk is made on which the OS has been installed, so select the drive and if you want to format the disk you can do it in the driver options


Then click next and a dialog box will be opened showing that all the contents will be overwritten on the disk and click ok

After clicking ok the actual OS installation will be started

Then series of installation will be there NOTE THAT YOU MUST REMOVE THE PENDRIVE AFTER THE COMPLETION OF EXPANDING WINDOWS FILES or after installing features or before the computer restarts otherwise the windows files will be loaded from the first step.

Then
 Then the setup asks for username of the pc
Then it asks for password enter a new password and click next.

Then in the next window click use recommended settings

Then set the correct date and time and click next

Then select the type of network

it is the last step is setup after clicking the appropriate network type the desktop will be prepared

At last we have successfully installed the OS….

4. our next step is make the new OS properly function for that it must be activated for this purpose only i have suggested the windows 8 all versions activator. Click it and follow the simple instructions and complete the task.
Then your system will be restarted, that’s it you have successfully changed the OS and activated it.
5.Then we have to install the drivers using DriverPackSolutions
6.Then install the necessary software’s like MS OFFICE, antivirus, media player etc... so that you can able to perform the basic tasks on your system without any problems.
That’s it guys we have changed the os successfully.
If any corrections in the above instructions then comment the post and i can be able to change it.
But i have tried this technique several times to change the OS and my system works quite properly.
Thank You for visiting the blog www.millioninformations.com
I will update further more information’s as soon as possible.
Subscribe to:
Post Comments
(
Atom
)


No comments :
Post a Comment