Monday 12 June 2017
How to display names using Button in Android
Download source code
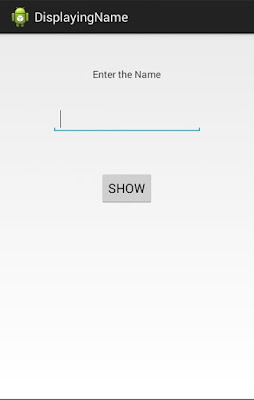
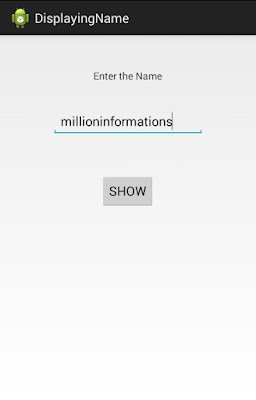
In this post we are going to display name which we are going to enter in a text field and when the button is clicked the entered name will be displayed.First we need to create a new Project in Eclipse IDE.
File ----> New ---> Android Application Project.
Give the project name and click Next--->Next-->Next--->Next---->Finish.
While creating any Project we need to make a simple design overview of that application.
It can be drawn in Paper or in Paint application.
Here I am using the first method , drawing the design in a paper.
Like this we are going to design the User Interface.
Open activity_main.xml file under DisplayingName(ProjectName)---->res---->activity_main.xml
Then find the Palette and Drag and drop the TextView element .
Then we need a place to enter the name that is called a plain text element which is found under the TextFields area.
Next we need a Button
After that we need to display the entered name for that we need text view.
Now our required elements are placed in our project, now we need to make some editing of the elements.
First we need to rename the textview, for that we need to right click on the textview--->EditText option.
Then we need to enter our desired text and click Ok.
After that you can see that the edited text will appear
Like that we can edit the Button name as Show and the last TextView to empty.
we can clear those warnings.
Go to values----> String .xml and open it.
Then type as in the image
After come to activity_main.xml and type as in the image.
Do the same for button and give the input type as text in Edit text
Now save all the errors and warnings will be gone now.
Next we need to start coding the java part for displaying the name.
Open MainActivity.java under the src folder.
Register the button and implement the interface and override the unimplemented methods as we saw in last post
Read Post
You can see the Button ID , Text Id in activity_main.xml
The coding till the last post is
We need to register the plaintext i.e edittext and text view to get the input and display the output.
Then we need to code the button part as in the image
The code is in the image.
Then Run the Program , right click on the Project Name and click Run as---> Android application
Read how to run Android app in your Mobile
The output is
input is the name of the edittext and getText() method is used to get what ever the text that the user gives inputs and settext is to set the text we want .
MainActivity.java
public class MainActivity extends Activity implements OnClickListener
{
EditText input;
TextView output;
@Override
protected void onCreate(Bundle savedInstanceState)
{
super.onCreate(savedInstanceState);
setContentView(R.layout.activity_main);
input=(EditText)findViewById(R.id.editText1);
output=(TextView)findViewById(R.id.textView2);
Button show=(Button)findViewById(R.id.button1);
show.setOnClickListener(this);
}
@Override
public void onClick(View arg0)
{
// TODO Auto-generated method stub
String name=input.getText().toString();
output.setText(name);
}
{
EditText input;
TextView output;
@Override
protected void onCreate(Bundle savedInstanceState)
{
super.onCreate(savedInstanceState);
setContentView(R.layout.activity_main);
input=(EditText)findViewById(R.id.editText1);
output=(TextView)findViewById(R.id.textView2);
Button show=(Button)findViewById(R.id.button1);
show.setOnClickListener(this);
}
@Override
public void onClick(View arg0)
{
// TODO Auto-generated method stub
String name=input.getText().toString();
output.setText(name);
}
This simple example will make you motivated to become an android app developer.
You find any error in this example send to my mail narain2829@gmail.com .
Subscribe to:
Post Comments
(
Atom
)


No comments :
Post a Comment